
Need help with how to replace garage door opener battery in Hampton Roads, VA? This easy-to-follow guide walks you through the process, saving you time and money with expert tips and local support.
If your garage door remote suddenly stops working, it doesn’t always mean you need a new system. Often, it’s a simple battery issue that can be fixed right at home. Many homeowners in Hampton Roads, VA, face this issue, especially during the colder months when batteries tend to lose power more quickly. Knowing how to replace the garage door opener battery in Hampton Roads, VA, can save you both frustration and the cost of unnecessary repairs.
With a wide variety of openers on the market today, understanding the basic steps to change a remote battery can help you maintain access to your garage without needing professional help. Whether you have a standard remote, a keyless entry pad, or a smart garage opener, the concept is the same: reliable access depends on a functioning battery. This task requires no technical expertise and typically takes less than 10 minutes from start to finish.
For homeowners in Hampton Roads, including Newport News, Williamsburg, and Chesapeake, this basic knowledge can be the difference between immediate access to your home and dealing with costly, time-consuming appointments. By learning how to replace garage door opener battery in Hampton Roads, VA, you’re taking a proactive step in your home maintenance routine.
Recognizing When It’s Time for a Battery Replacement
Understanding the signs of a failing battery is crucial for timely maintenance. One of the first indicators is an unresponsive garage door remote. If pressing the button yields no action from your garage door, it’s time to check the battery. A sluggish response or having to be unusually close to the door before it works are also common signs of a weak battery.
Other symptoms include dim lights on the remote or keypad or the door starting to move and then stopping midway. Wall-mounted keypads can experience similar issues due to battery depletion. Additionally, if you frequently change positions just to get a signal through, that’s a sign your battery might be failing.
If you live in Hampton Roads, where weather conditions can vary significantly, battery performance can be affected by humidity or colder temperatures. Knowing how to replace a garage door opener battery in Hampton Roads, VA, helps you stay ahead of the issue before it becomes a larger inconvenience.
The Right Tools and Battery Type You Need
Before getting started, gather the necessary tools and identify your battery type. Most garage door remotes use a CR2032 lithium coin cell battery, but some brands, such as Genie, LiftMaster, or Chamberlain, may use others, such as CR2025, AA, AAA, or even 9V for keypads.
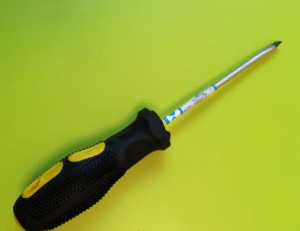
To safely replace the battery, you’ll need:
- A small flathead screwdriver or coin (to open the battery compartment)
- A replacement battery of the same model
- A clean, flat surface to prevent losing small parts
Read the model number on the old battery before purchasing a new one. Also, check your owner’s manual or visit the manufacturer’s website for instructions. Investing in name-brand batteries rather than generic ones can result in longer-lasting performance and less frequent replacements.
Step-by-Step Guide to Replacing the Garage Door Opener Battery

- Access the Battery Compartment: Start by locating your garage door remote or keypad. For handheld remotes, flip the device over and examine the back panel to find the small slot or screw that keeps the battery compartment closed. Most models have a notch that allows you to pry it open using a flathead screwdriver or even a sturdy coin like a quarter. Insert your tool into the slot and gently twist it to open the cover. Take care not to use too much force to avoid cracking the plastic. If you’re replacing a keypad battery, look for a release tab on the bottom or back of the unit. Press or slide the tab to lift the cover and expose the battery compartment.
- Remove the Dead Battery: Carefully remove the old battery once the compartment is open. Depending on your model, you might be dealing with a coin-cell battery (like CR2032), AA, AAA, or a 9V battery. Some batteries may be snug, so gently nudge them out using a non-metal tool if needed. As you remove the battery, take a moment to observe how it was installed—especially noting the orientation of the positive (+) and negative (−) ends. This step is crucial, as inserting the new battery incorrectly can lead to malfunction or permanent damage to the remote or keypad.
- Install the New Battery: With the old battery removed and the correct orientation in mind, insert the new battery into the compartment. Make sure it fits snugly and securely in place. If your remote uses contact points or springs, ensure these are correctly aligned with the battery terminals. Double-check that the battery is seated flat and isn’t tilted or misaligned. Using the wrong battery type or installing it incorrectly could result in poor performance or render the device completely non-functional.
- Test the Device: Before closing up the compartment, it’s a good idea to test the device to confirm that the new battery is working properly. Press the main button on the remote or enter your access code on the keypad. Watch to see if the garage door activates smoothly. If it doesn’t respond, double-check that the battery is installed correctly, that the contacts are clean, and make proper contact. If there’s still no response, try a second new battery in case the first one was faulty.
- Reassemble and Store Smartly: Once you’ve confirmed the remote or keypad is working as expected, reattach the battery compartment cover. Make sure it snaps or screws back into place securely to prevent dust or moisture from getting inside. Consider storing remotes in a consistent, dry location—ideally somewhere that avoids extreme temperatures, like your car’s glove compartment or a key rack inside your home. This helps preserve battery life and protects the remote’s internal electronics over time.
What If Battery Replacement Doesn’t Work?
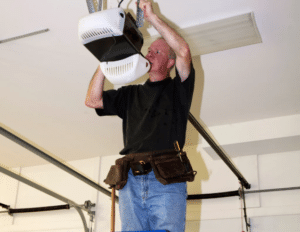
When a garage door remote stops functioning, replacing the battery is usually the first step, but if that doesn’t fix the problem, there may be other issues at play. In some cases, the internal components of the remote control may be worn out or damaged due to age or frequent use. This can prevent the remote from properly sending signals, even if the battery is new.
Another possibility is that the garage door opener’s receiver is malfunctioning or not correctly receiving signals from the remote. This could be due to a fault in the unit itself or issues with the wiring or antenna. Sometimes, the opener simply needs to be reset or resynchronized with the remote—something that can often be done by following the manufacturer’s reprogramming instructions in the manual.
It’s also important to consider environmental factors. Signal interference is a common issue, especially in densely populated areas like Hampton Roads, VA. Nearby electronics, Wi-Fi routers, or even certain types of lighting can disrupt the signal between your remote and opener.
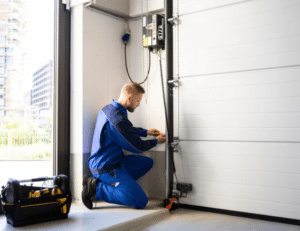
If you’ve tried replacing the battery, reprogramming the remote, and checking for interference, but the problem persists, it may be time to bring in a professional. A qualified technician can more accurately diagnose the root cause and make the necessary repairs or replacements.
Wallen Garage Door Repair and Installation in Hampton Roads, VA, offers fast and reliable diagnostic services. Their team can inspect your opener system, troubleshoot the issue, and recommend a solution to get your garage door working smoothly again—saving you time, stress, and potential safety concerns.
Battery Maintenance Tips for Long-Term Performance
Proactive maintenance can help extend battery life and prevent surprise failures. Here are some practical tips to help you get the best long-term performance out of your garage door opener batteries:
- Replace batteries annually, even if they are working fine. Batteries can weaken over time, and replacing them regularly helps prevent performance dips or sudden failure.
- Invest in high-quality, name-brand batteries. Premium batteries often provide longer-lasting power and more consistent performance than cheaper alternatives, which can degrade faster or leak.
- Properly store spare batteries. Keep backups in a cool, dry place, away from direct sunlight or humidity. Extreme temperatures can shorten battery life and reduce effectiveness.
- Clean battery contacts during replacement. Use a soft cloth or cotton swab with a small amount of rubbing alcohol to clean the battery terminals and contacts inside the remote gently. This helps prevent corrosion, which can interfere with power transmission.
- Label your remote with the battery replacement date. A simple piece of masking tape or a written note on the back of the remote makes it easy to track when you last changed the battery—helping you stay on top of annual maintenance.
Following these simple habits, you can help ensure your garage door opener remains dependable year-round. Regular battery care reduces the risk of inconvenient breakdowns and helps extend the life of both the battery and the remote itself.
FAQs About how to replace garage door opener battery
How often do you need to replace a garage door battery?
You typically need to replace a garage door battery every 1 to 2 years, depending on usage and battery type.
How do I know if my garage door opener needs a new battery?
You may notice the remote control works intermittently, the opener beeps, or a battery indicator light is flashing — all signs it may need a new battery.
Can you replace battery in garage door opener?
Yes, you can replace the battery in a garage door opener. Most models have an accessible battery compartment on the motor unit or remote.
How important is battery backup for garage door opener?
Battery backup is very important as it allows you to open and close the garage door during a power outage for safety and convenience.
How long does a garage door battery backup last?
A garage door battery backup typically lasts 1 to 2 years and can operate the door 20–50 times during a power outage before needing a recharge.
Conclusion
Learning how to replace a garage door opener battery in Hampton Roads, VA, is quick and straightforward, and it can save time and hassle. While it may seem minor, keeping your garage door remote or keypad fully powered is essential for daily convenience and home security.
Being proactive with battery replacement ensures you’re never caught off guard by a non-functioning opener. Following a regular maintenance schedule reduces the chance of being locked out or dealing with late-night malfunctions.
When the issue goes deeper than the battery, homeowners across Hampton Roads—from Chesapeake to Williamsburg—can rely on Wallen Garage Door Repair and Installation for expert service. Our experienced technicians are trained to address a wide range of opener issues quickly and affordably.
End Note
Wallen Garage Door Repair and Installation in Hampton Roads, VA, offers a dependable solution to all your garage door opener concerns. Our professional team is equipped to handle everything from remote synchronization issues to full motor replacements. We’re proud to service industry leaders such as Genie and LiftMaster with expertise and precision.
Our replacement options include cutting-edge technology, making your garage access more secure and efficient. We offer smart garage door openers for homeowners looking to modernize, allowing remote access and monitoring directly from your smartphone. Whether you’re in Hampton, Newport News, Williamsburg, or Chesapeake, we can assist you.
You can learn more about our company, explore our past projects in our gallery, or stay informed with our helpful blog. If you’re interested in a rewarding career with us, visit our careers page. For real-time tips, product showcases, and updates, follow us on Facebook, Instagram, and Pinterest. Browse our complete list of service areas to see how we can bring high-quality garage door solutions to your neighborhood.